Tuesday, June 29, 2010

Parks and Rec Class Wk 1

I am currently teaching a class at my local Parks and Rec! Last Tuesday was the first of a 4 week session. I have to be honest I wasn't sure what to expect when I got there. I had no idea the level of stampers I had or if they had even stamped before in there lives! Let me say that they all did great! 
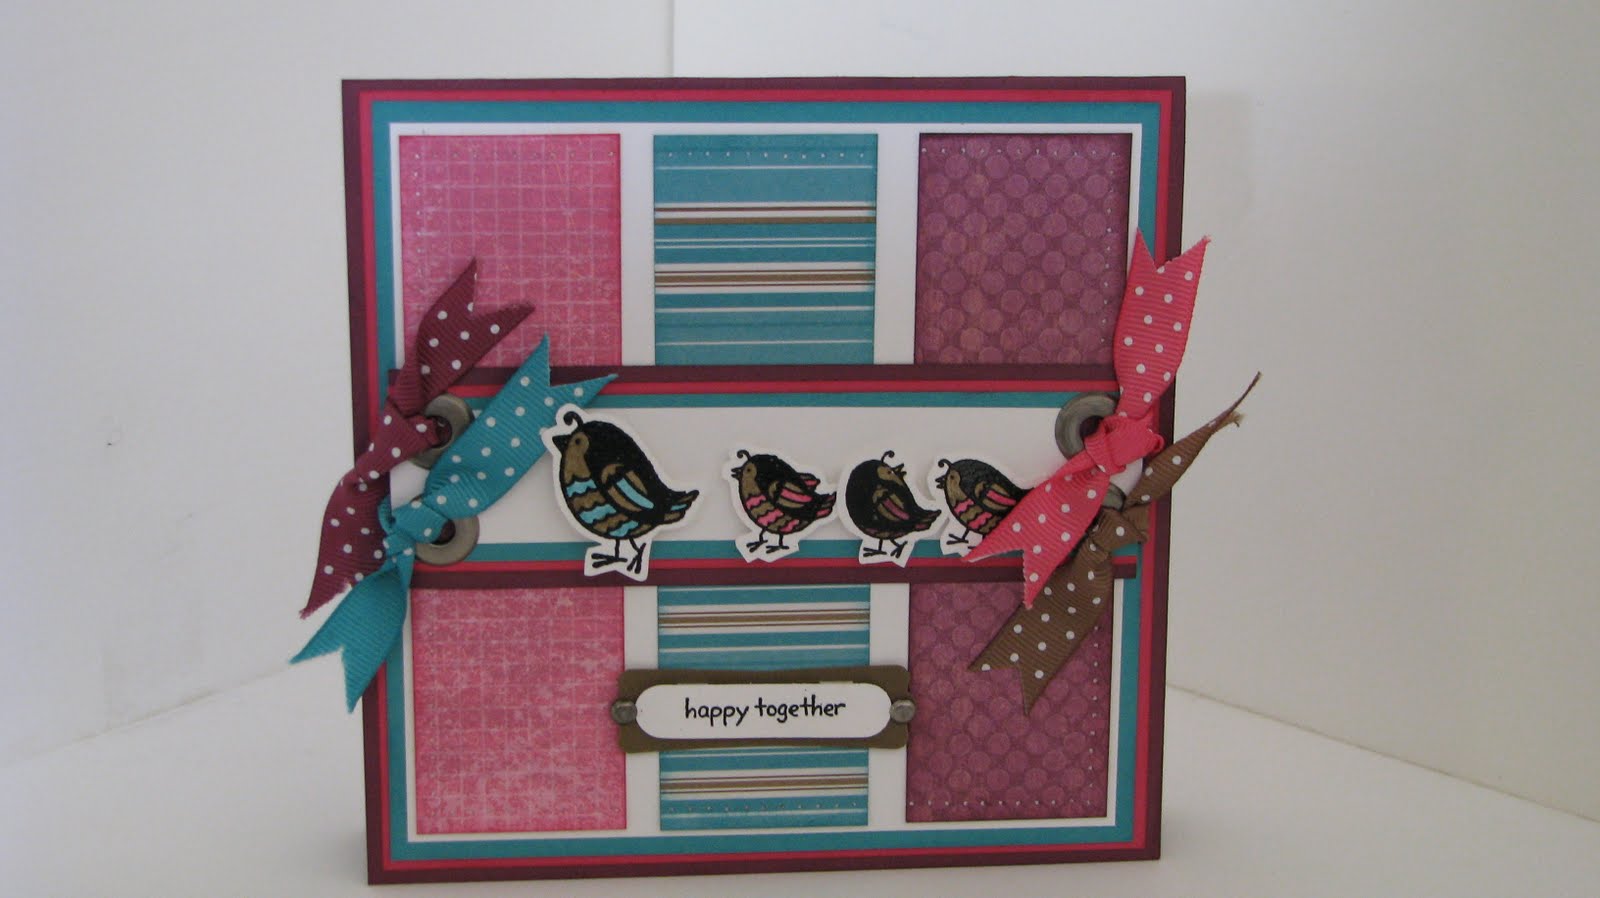
Here is my first card. A collage style card using Elements of Style set and the new Greenhouse Gala DSP
These next two I pulled inspiration from our idea book 2009-2010. Pages 61 and 107. I just added my own touch! Check back tomorrow for this weeks creations!!!


Monday, June 28, 2010

3D club project!

So I try to post one of the two things we are doing for my club the day of...it seems to get everyone excited to come create that night! But that becomes a slight problem when you don't actually come up with the project until the day of :)
Well this time around I am ahead of the game!!!! I got it done, and with plenty of time to post! So here she is... I took inspiration from a card made in the current summer mini catalog on page 19. Then made up a cute box and filled it with tea...to work with the cute saying on the front
"A woman is like a tea bag, you never know how strong she is until she gets into hot water"-Eleanor Roosevelt
From the set Favorite Thoughts.

Sunday, June 27, 2010

Girly Monkey

So a few weeks ago I posted a cute monkey card and scrapbook page I had cased from the stampin' success magazine stampin' up! puts out to demos!

Well it was my niece Paisley's birthday in May and since she loves the water my sister pushed her party off until June so she could have a pool party with a luau theme! When I originally made the monkey card I planned on giving it to Paisley
It seemed to fit the theme of the party perfect. But then the morning of I realized I hadn't wrapped her gift yet!!!! And of course the bag had to match the card! So here is the giant monkey I came up with. As you can see I added a flower to the head of the monkey on the card as well, to make her a bit more girly!

Here is an up close view of miss monkey!


Saturday, June 26, 2010

Open House Make-n-takes

Every year my mom and I throw a few open houses for our stamping customers. They are free of charge and lots of fun! Here are a few make-n-takes we made this time around... I really like the first one which was a note card size. I took different sized circle punches and used different papers in the Pink Flamingo DSP and created a tree!

Below is a cute gift card holder. I love this ice cream set! The colors are Bermuda Bay, Chocolate Chip, and Whisper White.

For some reason I couldn't get the other two pictures of make-n-takes to load. Be sure to check out my Mom's Blog to see the rest!
http://crazystampinglady.blogspot.com/

Friday, June 25, 2010

Father's Day Pictures and Stamping

Last weekend for Father's Day we had the family over to BBQ. There was tons of good food, and the kids seem to really enjoy our new mini pool! And here they are again swinging.

Here is my little Zavian hanging out in his swing. I can't believe he will be three months tomorrow! Here is his (there)proud daddy.


My dad with 4 of the 6 grand kids


My dad with the other two kids and me and my sister


And then for some stamping...

Here are some pictures of the gift card holder and card I made Aaron for father's day. He loves basketball. Normally I would think saying someone loves a sport is a bit much, but with Aaron I am not sure if it even fully captures how he feels about the sport. I would never want to ask -me or basketball....I would be afraid the answer wouldn't go in my favor! LOL Here is the gift card holder that had a Jamba Juice card in it. He also got a set of basketball DVD's he has been wanting.

The card I made with it is a shaker card! I got this idea from Maria one of my sidelines! Here is the link to her blog http://stampinista.blogspot.com/2010/04/just-basketball-shaker-card.html . I have to say I like her card much better. I was in a bit of a hurry to get this done on Father's Day morning and it is missing those extra little touches! Thanks for stopping by!


Thursday, June 24, 2010

Not Quite Artisan Worthy-Day 10

Last but certainly not least, my favorite, my hat box!


On the side of the box I used versa mark over the flower from the elegant trio stencil set, embossed, sponged and spritzed.Here is a close up of the flowers I made on the top
The lace was created by distressing and folding a strip of eyelet boarder-punched card stock.
That's is, that's all! Back to regular posting! Hope you enjoyed my Not Quite Artisan Award Worthy Entries!

Wednesday, June 23, 2010

Not Quite Artisan Worthy-Day 9

So maybe I need to branch away from square cards. I think it is my favorite type, I love that I have a nice big palette to work from. Here is a birthday card I came up with. The colors are so bright and cheery to me!


And what is better then a pop up cupcake inside?


Tuesday, June 22, 2010

Not Quite Artisan Worthy-Day 8

Well, I really liked this in person. But these pictures aren't so great :( So I guess just imagine it is AMAZING! LOL. Here is my black white and shades of grey, well I guess shade of grey scrap book page of Kamili-AKA cheeks!


Monday, June 21, 2010

Not Quite Artisan Worthy-Day 7

My two little angels! There is something about this picture of my girls that I just can't get enough of! Maybe because I wish they were always as peaceful and calm as they look in the picture?!? Who knows! But I just want to eat them up! Here are the flowers close up. I stamped two of the same image from the vintage vogue set, cut them out, shimmered them with shimmer paint, curled them with my bone folder and put a half pearl in the center!


Here is the stenciling close up. I stenciled with Sahara sand and then over part of it with shimmer paint.


Sunday, June 20, 2010

Not Quite Artisan Worthy-Day 6

So for the artisan award you have to submit two 3-d items. I struggled a bit with this because I am a self thought, only know the basics, not perfect-perfectionist type sewer. BUT I thought it was a good idea, so I went for it! Maybe I will blame me not winning the award on the fact that I am far from a seamstress! Yep, that is it, that's why I didn't win! :) So I sewed this pillow, added our ribbon as trim,and corduroy buttons as centers to the flowers which I made with.....
The little tiny pieces that cut out from the lattice die cut. I thought it was pretty clever, I guess stampin up! not so much :(

Saturday, June 19, 2010

Not Quite Artisan Worthy-Day 5

Well as some of you might know, I really enjoy water coloring. I love seeing how layers of color bring an image to life! On this card I water colored all of the images, then out a wash of our shimmer paint over it.
Here you can see a close up of the shading!
Not great at water coloring??? I will be having a class coming up soon on some important techniques and styles! More details to come!


Friday, June 18, 2010

Not Quite Artisan Worthy-Day 4

Corduroy buttons...boy will I miss you! I love these fuzzy little guys! Here is a cute, and somewhat simple card I made for the contest!
Come back tomorrow to check out more!


Thursday, June 17, 2010

Not Quite Artisan Worthy-Day 3

I love this card! Call me conceded, or whatever you want, but I truly love this card! I think it is the moon...so I had to show you a close up!

I hand cut it , and the shading and detail gave it such depth! Anyways its gone now! Gone forever! :)


Wednesday, June 16, 2010

Not Quite Artisan Worthy-Day 2

I love this set! This is one of Five cards I had to submit for the award! Here is a close up so you can see a few of the details!More of my entries to come! Make sure you check back!


Tuesday, June 15, 2010

Not Quite Artisan Worthy-Day 1

Ok...so with much sadness I am posting my not quite artisan award worthy projects. Well at least I hope they were only not quite, and not-"not even close to artisan award worthy" We will go with the first of the two! It makes me feel better! So for the next ten days you will get a glimpse of what I think was some of my better work.

Here is one of the three scrapbook pages I did. As you can see in the pictures I had JUST had a baby when the project were due(not blaming him or anything...just saying) So here is the page I made of my cutie pie!
The most frustrating thing about this page to me was that the whales aren't straight!!!!I cut the paper straight, but the printing is at a angle. Had I had extra time, I would have done a re-do. But time was-a-tickin'

Here is a close up showing how I double cut his name with my big shot dies.

Hope you like it. Stop by tomorrow for more!

Sunday, June 13, 2010

Daffodils!!!!

So I love clean lines, in my design, in clothing, somewhat in my cards, but defiantly in flowers! I am not a rose kinda girl...which my husband picked up on very quickly:)
Lilies, orchids,iris, and daffodils rank in my top five! I love the simplicity of these flowers! So when I got the new Island Floral die I knew right away what had to be done!
Daffodils!!!!Since they are so large, they are a bit difficult to put on a card. They are VERY 3-d and about the size of an actual daffodil. Show above it the finished flower box I came up with. With a few sneak peeks of our new products available July 1st. I used, of course the new daffodil delight card stock, old olive card stock, and the new Greenhouse Gala DSP!!! The stamp set is also new...called Friends never fade. The images are stamped in the new early espresso, baja breeze, and real red! Hope you enjoy the tutorial.
Step 1
You will need 2 squares 3 1/2" and I strip 1 1/2"x4 1/4


Step 2
Cut the two squares into the three petal flower on the island floral die, scallop one side of the strip of paper and score the other side 1/4" up


step 3
Sponge the edge of the petals and scallop on the strip. Fold the score line up on towards the shaded side of the scallop, then cut small slits into the bottom of the scallop strip up to the score line. Curl with a bone folder the petals upward to form a cup-like shape, curl the scallop down with the shaded side facing up.


step 4
Glue the two flowers together and form a circle with the scalloped strip gluing the seam with tombo, you can use a paper clip to hold it together while it dries.


Step 5
Once the scallop strip has dried, put a small amount of mono adhesive on the tabs you cut.


step 6
Press it down on the center of the flower. You will need to hold it for a minute so it can dry. I took the eraser end of a pencil and push it down on the tabs if the where popping up at all.


step 7
Add a large brad in the center of the flower to hold everything in place.
Thanks for stopping by!!!!!


Card Camp

Last Tuesday my mom and I held our monthly cards camp. We decided to focus on stenciling, so we used the elegant trio set to make our three cards with. Here is what we came up with...


I thought they turn out pretty nice. We tried to used them in different styles with different techniques to show the diversity of the stencils! Thanks for stopping by!